Teaching Your Kids To Drive

Thinking About Teaching Your Kids To Drive

Thinking About TeachingYour Kids To Drive ?

Save Time And Money

The following advice is for anyone who finds themselves in the same vehicle as a learner driver.  These simple pointers from someone with many years of experience of starring death in the face every day for many years sat in the instructor’s seat of my driving school car.  By using our lesson plans which are a full and comprehensive stage by stage structured driving programme with precise details. You can potentially end up saving hundreds of pounds on the cost your child’s driving lessons.

Using A Planned Lesson Structure

There are three especially important reasons to use planned lessons.  Practice with family members will be better targeted Your children will be better prepared fortheir lessons with their instructor. The result is better value from their Lessons and Knowing you are teaching the correct methods.

Research shows that more  driving practice learners get at home the safer they will be after passing their test.  Also, research shows that motor vehicle accidents are the single biggest killer of young people between the ages of 17 and 24, so getting the foundations right at the start of their learning is essential.
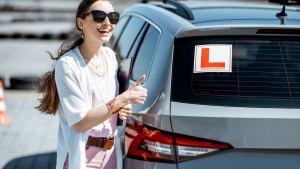
How Many Lessons Should It Take

The Driving & Vehicle Standards Agency (DVSA) say that the average learner today will need around 45 hours practice with an approved driving instructor (ADI) and a further 22 additional hours practice with family or friends.


The Legal Requirements

Before going out on the road with a learner driver you must ensure to comply with the minimum licence requirements.  Those who supervise a learner driver must be over the age of twenty-one and must  hold a full and valid licence.

driving lessons
           Be Sure You Comply With The Law

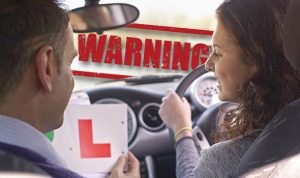
This can be a Great Britain (GB) Northern Ireland, European Community/European Economic Area (EC/EEA) driving licence for the type of vehicle you are using for the minimum of three years.  The person supervising the learner driver is legally responsible for the safety of the driver and all other road users. 

Remember when supervising a learner driver, you are not a passenger. The finally legal requirement is that the vehicle you are using is properly insured for the use of teaching your child.

Before You Take Your child Out

Know what you going to talk about and where you are going to take them.  Following steps below will help you through the highs and lows of sitting next to a learner driver.

Step One – Lesson Planning

Tailor the lessons to the needs of the experience of your child.  For example, if it’s your child’s first lesson and you are talking about car controls and how they should be used. Do not choose a busy area with lots of other traffic, because this will distract the attention of your child. 

On the other hand, if you are teaching an experienced child with many practical skills how to meet oncdriving school
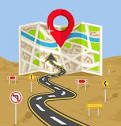
oming vehicles or emerging at roundabouts you do not want to be in a quiet area with no other vehicles or narrowing’s.  Your child’s instructor should give you lesson plans to help you if you ask for them.  If not, we can provide them for you.

Step Two – Route Planning

A poorly planned route often leads to a learner making many  mistakes which facilitated of the person supervising.  The learner gets stressed, mum or dad shouts, car stalls, both the learner anddriving tuition supervisor get stressed and upset. 

If the route is poorly planned it becomes hard even impossible to accurately assess the progress of the learner driver.  It puts the driver under undue and unnecessary stress which can often result in an argument, distracting the learner driver which could possibly lead to an accident. 

It will be difficult for you to distinguish the mistakes made from the lack of skill or understanding of the driver or the pressure of the route you have chosen.  Poorly planned routes will lead to slow learning, low motivation, and many heated and unnecessary arguments.  Route planning may seem to be organised but that is  what is needed.  By practising in areas and places suitable for the stage the driver is at makes the driver feel more comfortable. 

I am sure if you should ask the child’s instructor for advice, they will only be so happy to help.  You can request your childs instructor to sit in on some of your child’s lessons.  This will not only help you understand the stage and areas your child is comfortable with; you will also have the oppertunity to see  how driving lessons tailored.  Ask your instructor to supervise sessions, they too will help install more confidence in you.

A major problem with poorly planned or unsuitable routes, is other drivers who have forgotten they once learnt themselves are unforgiving of mistakes. They rarely notice your car displays ‘L’ plates and are quite happy to give a long shrill of the horn to know you have made a mistake.  This will undo any positive progress made in the lesson and will leave the driver feeling negative and embarrassed.  These situations can lead to an ever-present risk of road rage

Step Three – Setting Aims and Objectives

So now that you know what you wish to talk about on your lesson, and route you have planned, you now need to set the aims and objectives of the lesson.  Set these too low and your child overachieves and gains misplaced confidence.  Set them too high and your child feels negative and unable to do what is asked. 

For example (setting the aims and objectives too high)

(Aim) Today’s lesson I will teach you how to reverse parallel park the car safely, under full control and with due regard to all other road users.

(Objective) By the end of the lesson you will be able to do this

Remember your child has not done this before and unlikely to master at the first attempt.  By over setting the objectives stating they will do it, leaves them feeling negative and under achieving.  Keep your aims clear and your objectives achievable.  So instead of saying by the end of the lesson “you will be able to do this” you should say “by the end of the lesson you should have a good understanding of this exercise and feel more confident in doing it the next time”.

Step Four – Giving Clear Instruction

When teaching your child to drive, should you find yourself spending too much time trying to prevent them from stalling at a busy roundabout, traffic lights or traffic cues. This is normally due to the fact you are in the wrong place at the wrong time. 

Try to avoid busy and built up areas unless your child is nearing test standard.  In situations like this, most problems arise because not enough time was spent on the early lessons, where routines and mastering the basic control of the car on quieter roads were needed. 

It is easy to think it is good to help to motivate your child by changing to new and busier areas.  It will and often does cause problems later in their training. Getting the foundations properly in place is crucial for their future development and helps build the driver.  Ask your instructor where to go and what times are best.

When introducing a topic ensure you give clear and concise details.  Remember your child will do exactly as they are told.  Leave any information out and you will only get half of the job “the devil is truly in the detail”

For example

You are teaching your child how to change gears.  I know this will be a simple task for you but not for someone who has never done it before.  Most people would say dip the clutch and change gear, whereas the correct instruction when changing gears would be

  • Put left hand on the gear lever
  • Release the accelerator pedal, at the same time push the clutch pedal down fully.
  • Whilst pushing the gear lever to the left, move the gear lever down, going through neutral into second
  • Let the clutch pedal up slowly, at the same time lightly pressing the accelerator pedal
  • Put your left hand back on the steering wheel

It sounds like a lot of work but that is exactly what your child’s does need to do.

Do not assume you child knows what to do – confirm it in your instructions.

Avoid speaking geek (Give clear instructions)

We all know how I.T. technicians speak when either a computer breaks down or we lose our internet connection and you find yourself talking to the tech guy who uses words like, “VDU”. IP address, ECP, SAP, Cloud and Transformational”.  It is guaranteed to make my inner Luddite dizzy if not actually bleed from my ears or not respond. 

Terms like “soft”, “slowly”, “brake”, and “carefully” will have different meanings to different people.  When giving instructions you should always explain exactly what your idea of the meaning is.  In doing this it will prevent potential problems that can arise through misunderstanding.

For example

You want your child to slow down, so you say, “brake”.  This can result in you and your driver suddenly being thrown forward into the dashboard of your car as you did not stipulate how they should brake.  Where should you have said “I would like you to slow down by using the brake pedal gently”, you would achieve a more controlled decrease of speed. 

Try to focus on the action rather than on the desired results.  If your child panics approaching traffic lights or a similar situation, screaming “slow down, brake” is unlikely to help.  Saying the words gently and progressively press the footbrake may be more useful.

Focus on being positive, avoid saying keep away from the kerb or parked cars as it is more likely to result in the driver getting closer.  Reconfirm their road position which should be one metre from the left and telling them to look well ahead. This move their attention away from the parked cars and will most likely have the desired effect. 

Step Five – Making progress   (How fast to go?)

The most common mistakes I have witnessed drivers make over the many years I have been an instructor is that they approach hazards too fast.  This is normally down the fact that the hazard routine has not been taught or used properly. 

This means the reduction of speed before the gear change.  This often results in the pupil saying there is not enough time to do everything.If you are not familiar with the hazard routine, you are probably doing more harm than good sitting next to your child.  This does lead to extra time with a professional instructor to sort out these problems, resulting in added costs. 

If a basic hazard routine is not a habit problem will arise later in their training.  You can get examples of hazard routines in many publications/books about driving or we will be happy to help you.  Contact us on 01639 64 54 22 or 07876 277 346

Email info@nextgenerationschoolofmotoring.co.uk

Visit our website www.nextgenerationschoolofmotoring.co.uk

Or follow my blogs on face book and twitter

And finally

Accept that your child will not respond as quickly to situations as you do and will need to drive slower to compensate.  Be patient and try to remember what the learning process was like for you.                      

Teaching safe driving for life


Leave a Comment

Your email address will not be published.